Turn IKEA Floor Tiles Into A Chic DIY Room Divider For A More Private Space
Open-concept spaces and studio apartments are tricky places to create privacy and coziness. One way to divide up a large space and define smaller, more private areas is with some kind of room divider or privacy screen. To carve out a privacy nook at home, the ideal solution would stretch floor to ceiling ... but that can be expensive and challenging in a rental without damaging drywall.
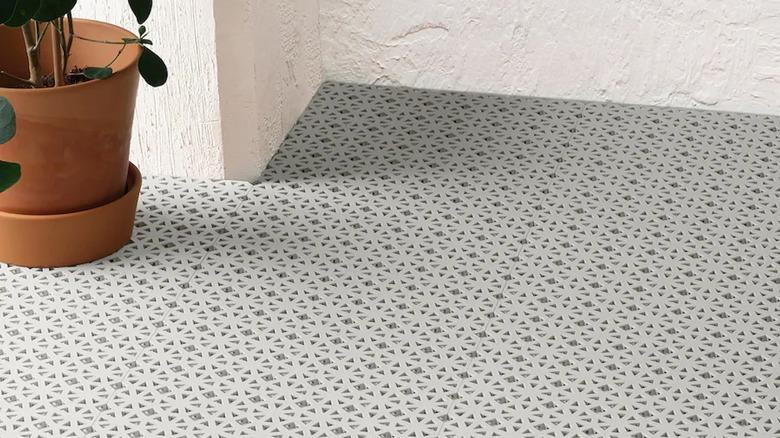
Thankfully, YouTuber Yoduvh Essentials shared her clever answer to create a renter-friendly, full-height privacy screen that wouldn't break the bank. Her requirements were that the privacy screen was damage-free, lightweight for temporary suspension from the ceiling, durable, and see-through from floor-to-ceiling. The IKEA ALTAPPEN decking floor tiles fit the bill, featuring an open octagonal wagon wheel pattern, extremely lightweight material that could still hang flat, and robust outdoor-friendly sturdiness.
At $12.99 per nine-pack, with each tile being 11 ¾ inches square, you'll need about a box per each floor-to-ceiling strip if you have 9-foot ceilings. Keep the height of the hanging hardware (mounting board, hooks, and rings) in mind when you calculate the final panel dimensions and tile requirements so that it won't end up hitting the floor. The panels can be cut, but the raw edge would need to be covered using a decorative trim like on the video. Remember that Command strips will not adhere to textured ceilings, so you'll need another installation approach if you have those. Once you have your layout planned and the flooring packs purchased, you're ready to dive into this creative renter-friendly, ceiling-mounted privacy screen hack.
Create a custom-sized privacy screen with connected IKEA ALTAPPEN decking tiles
The IKEA ALTAPPEN decking tiles have a simple click-together design, so creating each floor-to-ceiling strip is only a matter of lining up the appropriate number of tiles for your ceiling height and pressing them into place. Arrange the triangular connectors, which are located on two adjacent sides of the tiles, in such a way that one set is facing upward (to function as the loops for the ceiling suspension) and the other set faces one consistent side (to connect to the neighboring strip if desired). This will give you a clean outer edge and bottom of the final privacy screen, though you'll need to use a hand saw to remove the side loops from the final strip for a clean second outside edge.
While you could certainly keep things simple and connect all strips together to form one large privacy panel, the YouTuber chose to make her panel wider and more decorative by placing a PVC lattice molding strip (about 1 ½ to 2 inches wide) covered with mirror contact paper between the panels and at the bottom as a glam finishing touch, adhering the strips with a glue gun. She applies them once the strips are already hung, but it's likely easier to assemble on the floor for the best results and spacing. If you like the look of the divide strips, but glam isn't your style, find a contact paper that suits your aesthetic, such as faux-marble for a hint of luxury or a pop of color for some fun. Alternatively, try a gorgeous woven peel-and-stick grasscloth wallpaper for an organic textural vibe.
Hang your IKEA ALTAPPEN privacy screen from the ceiling
Once your privacy panel is assembled, it's time to hang it. For renters or those who want a damage-free installation, purchase a piece of ¾-inch thick PVC board. Lay it on the floor next to your room divider and mark a spot in the center of the board where each triangle connector loop will be located to know where to pre-drill the holes for hooks. Next, attach strong adhesive picture-hanging strips to the back side of the board, opposite the holes. Press firmly to adhere properly. Flip it back over and screw in a ceiling hook (with a stem shorter than ¾ inches) for each pre-drilled location, facing them all the same direction.
Use the second side of the Command strips to firmly stick the PVC board to the smooth ceiling, letting it sit for the instructed amount of curing time before hanging the panel. Finally, clip a binder ring on each of the connector loops at the top of the privacy panel and hang them on each hook, grabbing a buddy to assist if you've chosen to install the large panel all together rather than as individual strips.
If you're a homeowner with textured ceilings or want a more permanent, durable solution, use screw-in ceiling hooks or a fixed strip of wood with hooks screwed into the ceiling for a sturdier installation. No matter which aesthetic or installation method works best for your particular space, try this genius IKEA ALTAPPEN decking tile hack to DIY a one-of-a-kind, durable, and lightweight ceiling-mounted privacy screen.