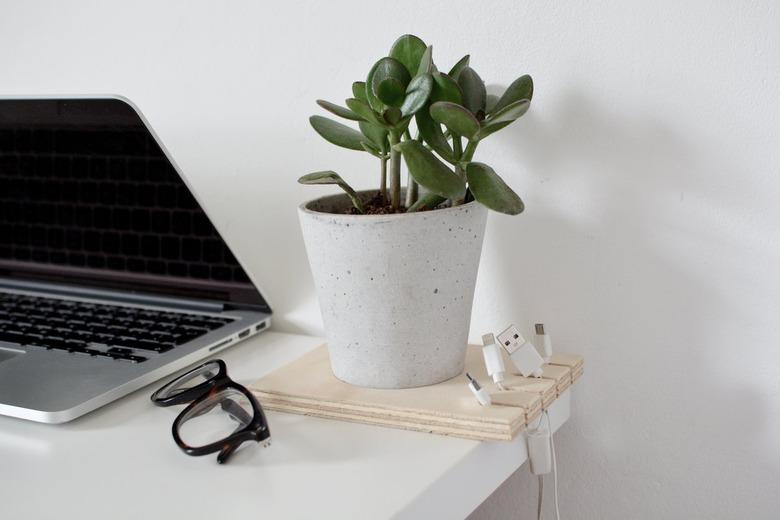
We Highly Encourage You To Make This Cable Organizer For Your Desk
We may receive a commission on purchases made from links.
If there's one thing that's bound to ruin the form and function of an organized desk, it's a bunch of unruly wires and cables. Luckily there's a simple solution: a DIY desk organizer that arranges all your tech essentials into one tidy spot. We've created this minimal plywood piece that keeps cables separated, and it also provides a space for displaying your favorite plant. Because, why not?
Things Needed
-
Plywood board, 4-3/4 inches by 6 inches
-
Saw or jigsaw
-
Sandpaper
Step 1
Grab a ruler and mark the following points at one of the shorter ends of the plywood: 3/4 inch, 1-3/4 inch, 2-3/4 inch, and 3 3/4 inch. Draw a 1-inch pencil line at these points.
Step 2
Repeat the above step, however this time draw pencil lines at these measurements: 1inch, 2 inch, 3 inch, and 4 inches. These lines indicate where your cables slots will be. (You can also customize these measurements according to how many slots you'll need.)
Step 3
Take a pencil and box off the top of the slots. Drill through the top of the slot using a power drill with a wood drill bit no wider than a 1/4 inch.
TIP: Place some scrap wood underneath to protect your work surface when drilling.
Step 4
Secure the plywood with a hand clamp and cut along the pencil lines with a jigsaw or hand saw to reveal the slots. Use sandpaper to smooth any rough edges.
Step 5
You can leave the cable organizer as it is, but we wanted to incorporate a snazzy plant feature into ours. To do this, measure the width of a small plant pot (ours was three inches wide.) Then take a hole saw with the same diameter and draw around it with a pencil to indicate where the plant pot will sit on the organizer.
Step 6
Insert the hole saw attachment to your power drill and cut out the hole you've marked in the previous step. Pop in your planter to finish.
TIP: Instead of the plant, a scented candle, or pen pot would also look great.
Voilà, one tangle-free workspace!


