Absolutely Charming DIY Pinch Pleat Cafe Curtains
We may receive a commission on purchases made from links.
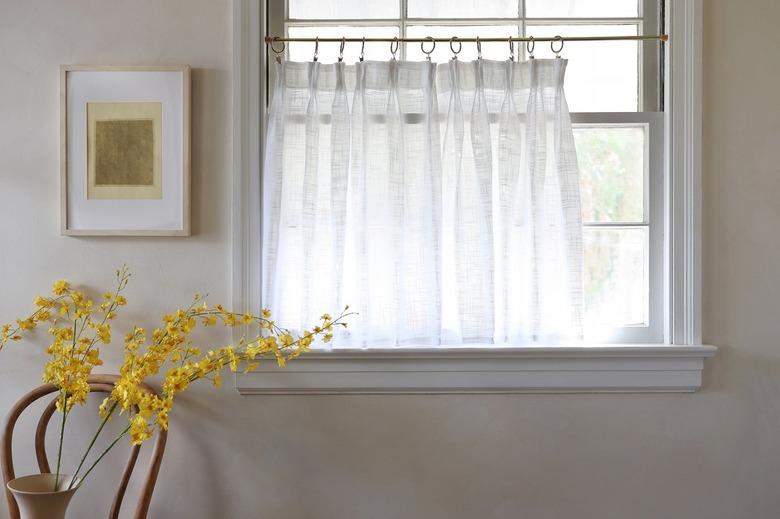
If you happen to have a window in your home where you crave a little more privacy — like in a kitchen or bath — but you don't want to block all of the lovely natural light, a cafe curtain is just the thing you need. It covers only a portion of the window while still letting the light shine through at the top. Making a cafe curtain is simple enough (this one requires no sewing!), and you can easily customize the size and fabric to fit your space and style perfectly. While standard cafe curtains have a charming cottage feel, we are going to add pinch pleats (aka French pleats) to give these more of a tailored look — because we're extra like that.
 Trisha Sprouse
Tip
We opted to use iron-on hemming tape to make this a no-sew project. However, you could use a sewing machine if you'd like to sew the hems.
Also, we recommend washing and drying your fabric before starting this project, in case it shrinks at all.
1. Install the curtain hardware.
Install your curtain rod and clips at the desired height within the window frame (you can use either a tension rod like we did or a rod with brackets affixed to the wall). Most cafe curtains hang from the halfway point to the bottom of a window, but you may wish for them to hang higher or lower depending on how much privacy you need.
 Trisha Sprouse
2. Measure the window.
Measure from the top of the curtain clips (the clip part, not the curtain ring) to the bottom of the window frame, and add two inches to get the height of your curtain. Now measure from one side of the window frame to the other, and double it to get the width of your curtain. This will ensure you will have plenty of fabric to create the pleats.
 Trisha Sprouse
3. Cut your fabric.
Cut your fabric to the height and width dimensions that you determined for your curtain. For example, our window measurements were 26 inches high by 40 inches wide, so we cut our fabric to 28 inches by 80 inches.
 Trisha Sprouse
4. Hem the curtain.
Start by hemming the raw edges on the two sides of the curtain, and then hem the top and bottom edges. Simply fold each raw edge over (1/2 inch) and press with a hot iron to make a crease.
 Trisha Sprouse
Then fold the fabric over another 1/2 inch and iron it again to crease it.
 Trisha Sprouse
Cut a piece of hemming tape to the same length of the edge you're hemming, and place it under the folded part of the fabric.
 Trisha Sprouse
Fold the fabric over the hemming tape, and press with a hot iron for 10 seconds to bond the adhesive on the tape.
 Trisha Sprouse
5. Attach the pleater tape.
Cut three strips of hemming tape to the same length as the top of the curtain. Place the strips along the top edge on the back side of the fabric. Space the rows so they are approximately the same width as the pleater tape.
 Trisha Sprouse
Place the pleater tape on top of the three rows of hemming tape. If you look closely at the pleater tape, you'll notice there are long skinny pockets, and each pocket has a small hole where you can insert the hooks. Make sure those little holes are at the bottom of the tape. Press the pleater tape with a hot iron to attach it to the fabric. Let cool.
 Trisha Sprouse
6. Insert the pinch pleat hooks.
Starting on one end of the curtain, insert the tip of the first prong on the pleater hook into the first hole on the pleater tape.
 Trisha Sprouse
Scrunch the fabric tightly together to insert the tips of the second, third, and fourth prongs into each adjacent hole. Once all of the tips are in, push all four prongs up so they are fully inserted into the long pockets. This step takes a little practice, but you'll get the hang of it quickly.
 Trisha Sprouse
Once the first hook is inserted, skip a hole on the pleater tape, and start the next hook in the hole after that. Continue adding hooks, skipping a hole in between each hook, until you get to the other end of the curtain.
 Trisha Sprouse
Tip
To ensure even spacing of the hooks, it may be helpful to start by putting a hook on each end of the curtain, and then work towards the middle from each side. We skipped a hole in between each hook but had to skip two holes in the very middle. It isn't very noticeable once the curtain is hung.
7. Iron the pleats (optional).
Hang the curtain on the rod by clipping a curtain ring on the back of each pleat. Most pinch pleats curtains have a stitch placed in the bottom of each pleat to hold the pleats in place. However, to keep this project fully no-sew, you can use a flat iron (yes, the kind you use to straighten your hair) to pleat the fabric.
Simply pinch the bottom of each pleat together — there should be three folds of fabric pinched together — and clamp the hot flat iron around the pinched portion for a few seconds. Then pull the flat iron two to three inches down the fabric to crease it under the pleat as well. Note: If you don't have a flat iron, you can iron the pleats with a regular iron before hanging the curtain.
 Trisha Sprouse
And that's all there is to making a pinch pleat cafe curtain. Enjoy the added privacy and the natural light!
 Trisha Sprouse
 Trisha Sprouse