How To Easily Add Fluting To The IKEA Billy Bookcase
We may receive a commission on purchases made from links.
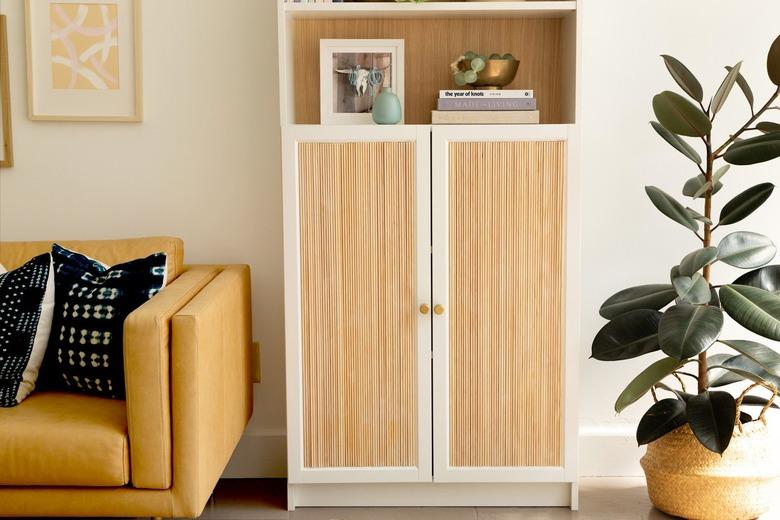
Turn a plain white bookcase into a new favorite piece of furniture in your home with this IKEA hack. We added moulding to the front of the cabinet doors in a natural wood color. We also added wood grain contact paper on the back panel to carry though the light wood look.
Wouldn't a few more of these bookcases look so great together along a wall in your living room?
Adding fluting to a piece of furniture is a simple way to add your own DIY touch. Like this fluted side table we made. Instead of using dowels, we opted for a rigged chair rail moulding in pine. This gives a unique fluted look and less cuts with the saw.
 Sara Albers
Things Needed
Step 1
Put together the bookcase per directions. Before you slide in the back panel, add contact paper to the top half of the panel (so it will show at the back of the open shelves). Use a wallpaper scraper to remove any bubbles when applying the sticky side to panel.
 Sara Albers
Step 2
Measure the inside of cabinet door fronts. The inside rectangle shape is a little over 34 inches tall by 12 inches wide. We used 16 pieces on each cabinet. You can use a hand saw or, even faster, a table saw to cut the pieces. Cut each moulding piece at 34 inches in length. You will be able to get two from each 8-foot moulding.
 Sara Albers
Step 3
Place each piece of moulding on the door front and sand the edges if they are a little long.
 Sara Albers
Step 4
Use wood glue to adhere the moulding pieces to the door fronts. Allow to dry overnight. Place books on top of fluting to hold down the wood while drying.
 Sara Albers
Step 5
To remove a bit of the yellowish color of the raw wood, apply a thin layer of white wash stain. Wipe with towel, and then allow to dry. Hang the cabinet doors onto the bookshelf. Start to style those shelves!
 Sara Albers
 Sara Albers