Every Piece Of DIY Acrylic Pour Painting Art Is Completely Unique
We may receive a commission on purchases made from links.
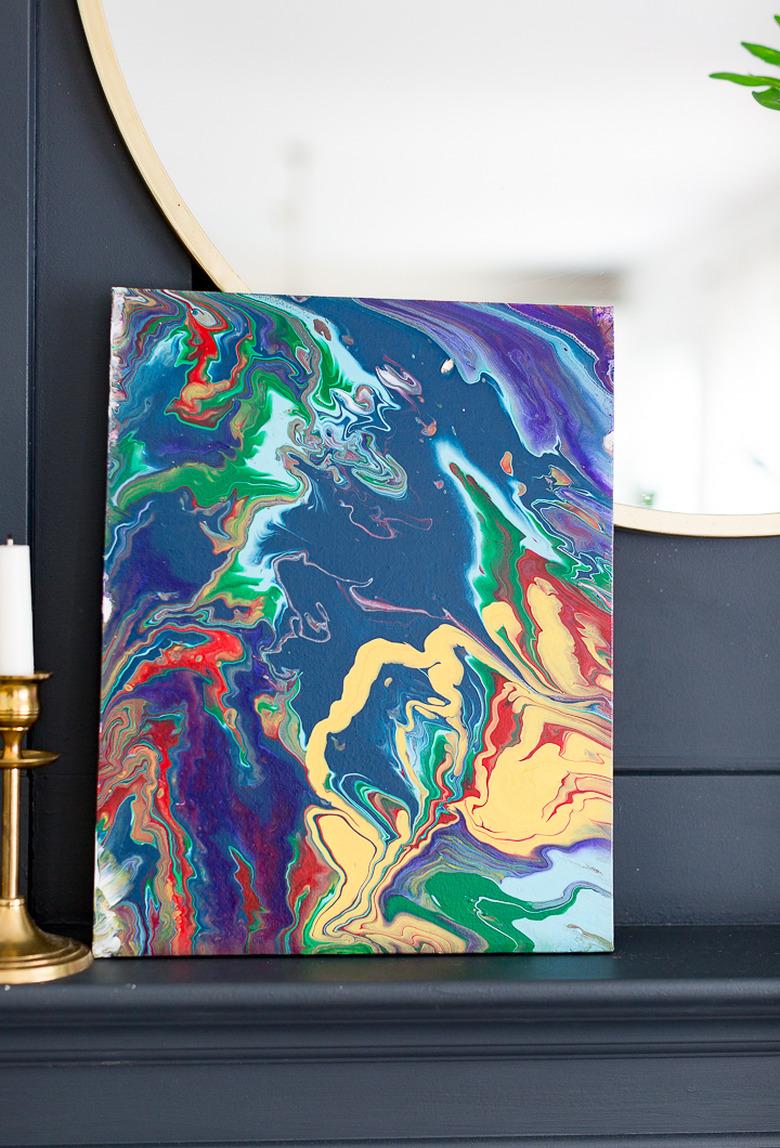
Acrylic pour, also known as "dirty pour" or "fluid art," has gained popularity over the past year. The popularity of this type of art could be attributed to the fact that it doesn't take a skilled artist to achieve gorgeous results. Each piece of art is unique because the paint creates various irregular lines and markings on the canvas.
 Lucy Akins
As this emerging art is explored and new methods and techniques are created, one fact remains: It's so satisfying to watch the paint flow as it combines and creates beautiful abstract markings on the canvas.
For this DIY, we're going to explore the basic method of acrylic pouring by mixing together pouring liquid and regular acrylics.
Things Needed
-
Acrylic paint (we used yellow, green, blue, light blue, red, white, and purple)
-
Measuring cup (or cup with a spout)
-
Kraft paper or drop cloth to protect surface
-
Rubber gloves (optional)
TIP: Keep in mind that if you mix cool and warm colors together, the paint will create what is called "mud." Mud is often a neutral or brown color.
 Lucy Akins
Step 1
On the back of the canvas, place a pushpin at each corner. This will elevate the canvas off the surface. Alternatively, you can use cans or cups under the canvas.
 Lucy Akins
Step 2
Pour one part pouring medium into a cup.
 Lucy Akins
 Lucy Akins
Step 3
Add two parts of your desired paint color to the cup with pouring medium.
TIP: Depending on the type of pouring medium and acrylic paint you use, the ratios will vary. It is best to follow the recommended ratios specified on the packaging.
 Lucy Akins
Step 4
Use a stir stick to mix the two thoroughly.
 Lucy Akins
Step 5
Follow the same procedure with every color you wish to use.
 Lucy Akins
Step 6
Place a base layer (your choice of color that you just mixed with the pouring medium) onto the canvas. Using a palette knife spread it over the entire surface.
 Lucy Akins
Step 7
First, pour the color you want to appear last into a measuring cup or cup with a spout.
TIP: The colors will pour out backward; so the first color you pour into the cup will be the last color on the canvas.
 Lucy Akins
Step 8
Pour each color into the measuring cup — be sure to pour it along the side of the cup. This allows the paint to flow into the cup slower and prevents colors from mixing prematurely.
 Lucy Akins
Step 9
Continue to pour the paint in your desired order.
 Lucy Akins
 Lucy Akins
 Lucy Akins
 Lucy Akins
Step 10
Use the spout of the cup to slowly pour paint onto the canvas. You can continue to pour the paint onto one area and allow paint to spread.
 Lucy Akins
Step 11
Or you can move the cup across the canvas to paint onto different areas.
 Lucy Akins
Step 12
Once all the paint has been poured, slowly tilt the canvas back and forth to spread the paint throughout the canvas.
 Lucy Akins
Step 13
Continue to tilt back and forth until the entire canvas is covered.
 Lucy Akins
Step 14
Allow the paint to dry for 24 to 48 hours.
 Lucy Akins
 Lucy Akins
The possibilities of color combinations and markings are endless with this type of art. You can also create "cells" using an art torch, which will create incredibly interesting and fascinating markings. Continue to explore with various methods and have fun.
 Lucy Akins