How To Put Ribbon Garland On A Christmas Tree
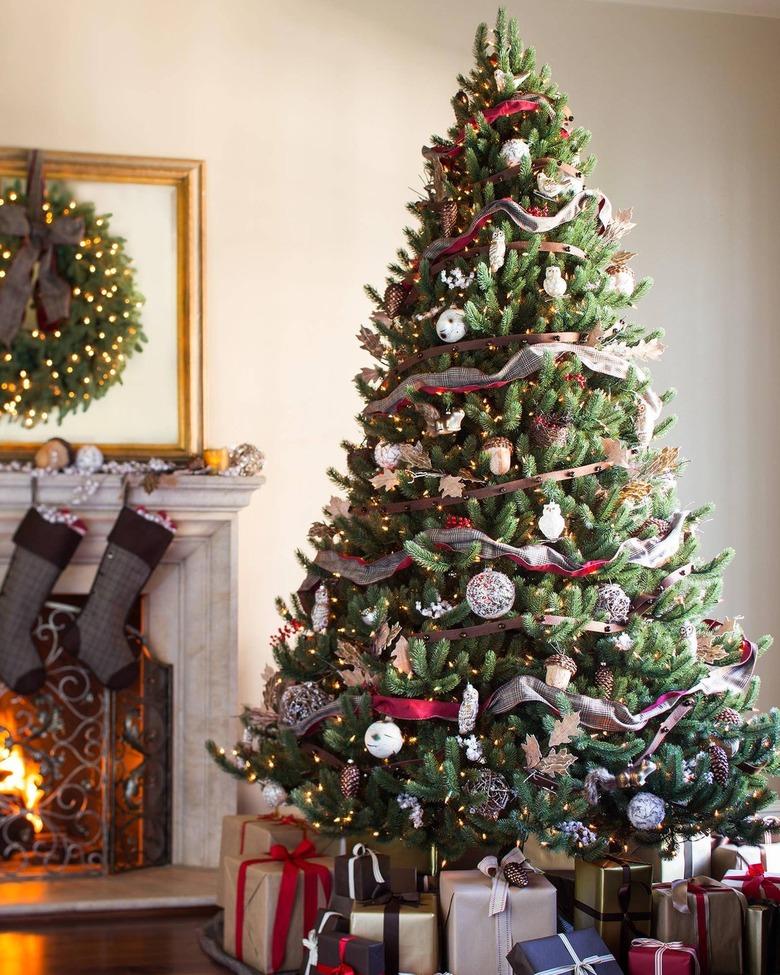
Decorating the Christmas tree marks the beginning of the holiday season — and whether you're going for a minimalist Scandi vibe or packing your tree to the max with decorations, ribbon garlands can serve as the perfect solution to concealing those bare spots on your holiday centerpiece, while also adding a touch of color and texture. Though there are no set rules to placing ribbon garland, positioning it incorrectly can make your tree look too busy.
Ready to trim your tree with a ribbon garland? Follow these steps for a gorgeous design.
Things Needed
-
Ribbon garland of various sizes
-
Faux garland or faux greenery
-
Ornaments and lights
Tip
Using ribbons of varying size and shape will add interest and texture to your tree.

1. Assemble the Tree
If you're using an artificial tree, assemble the tree according to the manufacturer's instructions, and "fluff" each branch to fill out any gaps.
2. Install Tree Lights
 Lucy Akins
If your tree is not pre-lit, string lights around the tree.
3. Prepare the Garland
 Lucy Akins
Cut some garland into several 1-foot pieces. Gather any other faux greenery you might want to use. These will serve as fillers in the tree and help fill in any gaps.
4. Fill any Gaps
 Lucy Akins
Insert garland and greenery to cover noticeable gaps.
Tip
Each time after inserting a few pieces of garland and/or greenery, step away from the tree to ensure you are "filling" the tree evenly, and assess where the remaining gaps may be.
5. Ready Your Pipe Cleaners
 Lucy Akins
Cut several 6-inch pieces of green pipe cleaners.
6. Start Your Garland
 Lucy Akins
Wrap the end of your ribbon with a pipe cleaner, leaving some excess open at the ends (which will serve to anchor to the tree).
7. Secure the Garland Ties
 Lucy Akins
Continue tying the pipe cleaners approximately 1 1/2 feet apart along the ribbon.
Tip
Feel free to cut your ribbon every 6 feet or so to make wrapping it around the tree a little easier and more manageable.
8. Secure the Top of the Garland
 Lucy Akins
Starting at the very top of the tree, tie the end of the ribbon to the back of the tree by twisting the excess pipe cleaner stem around a branch.
9. Wrap the Garland
 Lucy Akins
Bring the ribbon around and tie the next pipe cleaner onto a branch of the tree.
10. Work the Garland Around the Tree
 Lucy Akins
Keep going around and tie the third pipe cleaner to the side of the tree. Allow the ribbon to hang a bit loosely in between each tie as opposed to being pulled taut.
Tip
You can also use the tree branches to secure the ribbon onto the tree as pictured below.
11. Finish Wrapping the Tree
 Lucy Akins
Continue the tree wrapping process in a zigzag manner, leaving even spaces in between layers.
12. Make Your Garland Longer
 Lucy Akins
Once your ribbon runs out, tie a second ribbon to the back of the tree (as outlined in Step 8).
13. Keep on Wrapping
 Lucy Akins
Continue wrapping and tying ribbon, leaving even spaces in between layers.
14. Proceed to the Bottom
 Lucy Akins
Proceed all the way to the bottom of the tree, making the loops of the ribbon a little looser towards the bottom, and following the triangular shape of the tree.
15. Change Up the Garland
 Lucy Akins
For a little more interest, use a different size and shape of ribbon. Tie a pipe cleaner to the end.
16. Wrap the Tree in the New Garland
 Lucy Akins
Loosely wrap the second type of ribbon around the tree in alternating rows, allowing organic movement.
17. Sort Your Ornaments
 Lucy Akins
Sort ornaments from smallest to largest and lightest to heaviest.
18. Place the Ornaments on the Tree
Starting at the top of the tree, begin placing your small/light ornaments, followed by medium and then largest/heaviest as you proceed down the tree. Add any interesting and unusually shaped ornaments last.
19. Make a Tree Topper
 Lucy Akins
To make the topper, tie a simple bow with your main ribbon and thread a piece of green pipe cleaner to the back of the bow.
20. Place the Tree Topper
 Lucy Akins
Attach the bow to the very top of the tree.
21. Shape the Tree
 Lucy Akins
Tuck the excess ribbon from the bow into the sides of the tree, ensuring you do not alter the shape of the tree.
22. Make Any Adjustments
 Lucy Akins
Stand back and adjust any ornaments or ribbon as you see fit, and enjoy the magical glow of your newly decorated Christmas tree.