How To Plumb A Kitchen Sink Yourself
Plumbing a kitchen sink yourself is a great DIY project for all experience levels. If you make a mistake, you'll know right away because the connections won't match or water will drip, and it's easy to try again. The most difficult part about installing drain pipes under a kitchen sink is the awkward position you'll need to kneel or lie in to access the area, so put some old pillows down, wear knee pads and invest in a headlamp. Soon, you'll have a working kitchen sink drain.
Preparing to Plumb Your Sink
Your sink should already be in place and firmly mounted to the counter. You should also have water supply lines and drain lines readily accessible under the sink. Installing these is a job for the pros, but you can handle connecting them to your kitchen sink.
If there's an electrical outlet under the sink, use plastic outlet covers to protect it from any drips that may occur. Make sure the water supply valve stays off until you're ready to check for any leaky connections.
To simplify the process of buying the correct diameter and length of PVC pipes and the proper connections, consider purchasing a kitchen sink drain kit. Otherwise, you'll need a selection of 1.5-inch-diameter PVC pipes, a P-trap, a T-joint if you have a double-basin sink, two elbow joints and plenty of slip joint nuts and beveled washers for each connection. A PVC pipe cutter, sink drain assembly (get two if you have a double-basin sink) and plumber's putty are also required for this project.
Installing the Sink Drain Assembly
First, you'll need to install the sink drain assembly, which is an insert that prevents large objects from falling down the drain, gives you a place to rest a strainer or stopper and provides a small pipe for the rest of the PVC drain pipes to connect to. Unscrew the nut and washer from the bottom of the sink drain assembly and set them aside.
Roll plumber's putty into a snake and press it under the rim of the sink drain assembly, firmly pushing it into place within the sink's drain hole. Use a toothpick or the stick from an ice pop to scrape off the excess plumber's putty, and go under the sink to secure the rubber washer and nut to the lower half of the sink drain assembly with a wrench. Don't overtighten any fittings since the materials can crack.
Installing the First Drain Pipes
Now you can start putting together the PVC pipes. According to DIY With Michael Borders, you should slide a PVC slip joint nut over the PVC pipe flat side first, followed by a beveled poly or rubber washer wide side first. This will place the nut washer in the correct position for a water-tight seal. You can use trial and error to determine the proper length for each section of the pipe.
Start at the wall connection since you don't want the other pipes to extend past this connection. Wrap Teflon tape clockwise around the threads of the protruding pipe if it's galvanized steel, and attach a 90-degree elbow connection with the opening facing down. Next, secure the P-trap to this connection using the smaller arm of the P-trap.
Making the Final Drain Connections
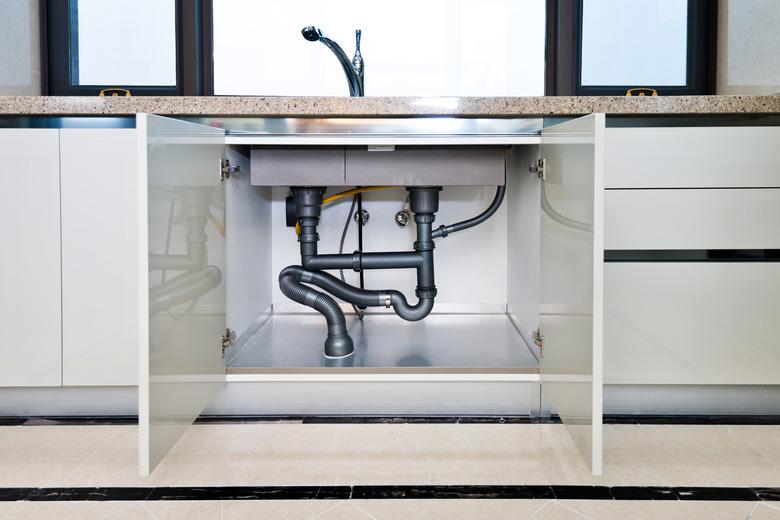
How you configure the next part of the plumbing depends on whether you have one or two basins in your sink. For a single-basin sink, attach a straight PVC pipe from the sink drain to the P-trap. For a double-basin sink, attach 90-degree elbows to each drain, connect them with straight pipes and a T-joint and use another straight piece of PVC to connect to the P-trap.
According to Hugo Correa, the location of the T-joint doesn't have to be in the exact center between the two sink drains. Cut the pipes to an appropriate length so no part of the drain system is being pushed up or down, which could lead to cracking.
Once all of the connections have been made, pour some water down the sink drain and look for any leaks. If all goes well with a small amount of water, put a stopper in the sink, fill the basin with about a gallon of water and pull the stopper to allow the water to rush through. If the drain is still leak-free, the installation is complete.
